At IMUPRU (“I’m up, are you!?”), we love creating inspirational and custom laser-cut pieces that bring warmth and meaning to any space. Recently, I had the opportunity to craft a special wood sign for my mother-in-law’s home—one that carries a powerful message for anyone heading out the door. This project was a labor of love, and today, I’m taking you behind the scenes to show you how it all came together!
Step 1: Letting the Magic Happen – Laser Engraving the Design

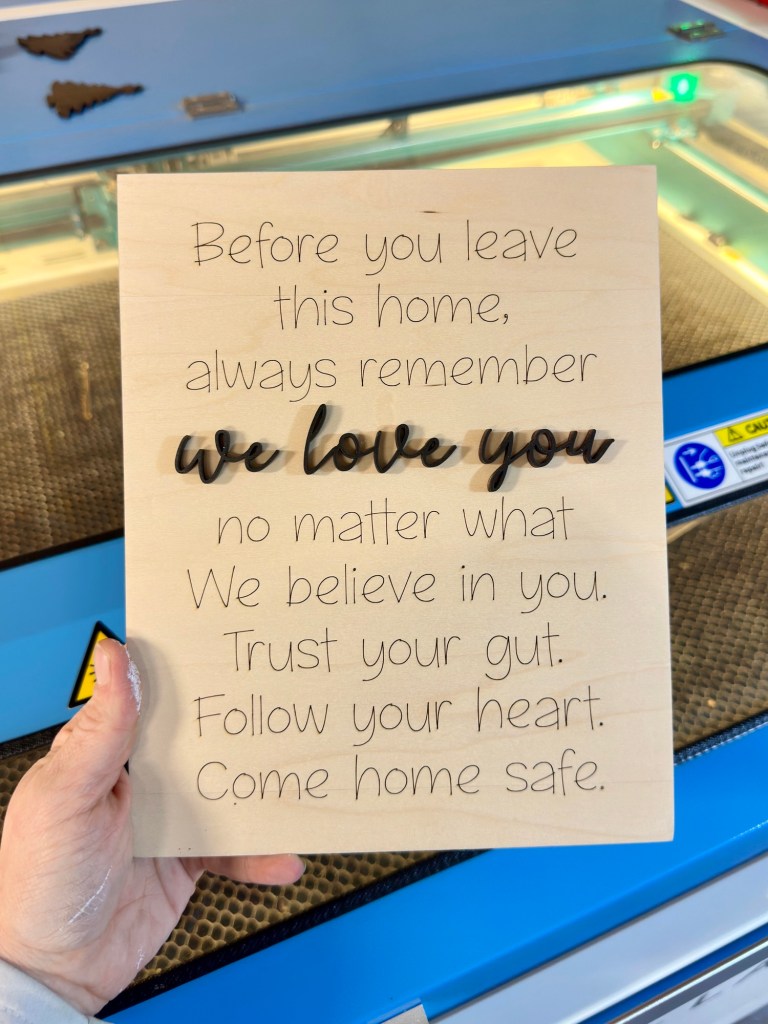
Once we uploaded the “Before You Leave This Home” design into our Thunder Laser Nova 51/130, it was time to let the magic happen! Watching the laser work is always so satisfying. The precision and clean lines it creates are what make our custom signs so special.
In this step, the laser burns the design into the wood, leaving behind crisp, dark lettering that gives it a beautifully rustic look. You might notice a bit of char around the edges of the letters, but that’s totally normal! It just means it’s time for the next step—sanding it down to perfection.
Step 2: Sanding It Smooth with My New Kobalt Brushless Palm Sander
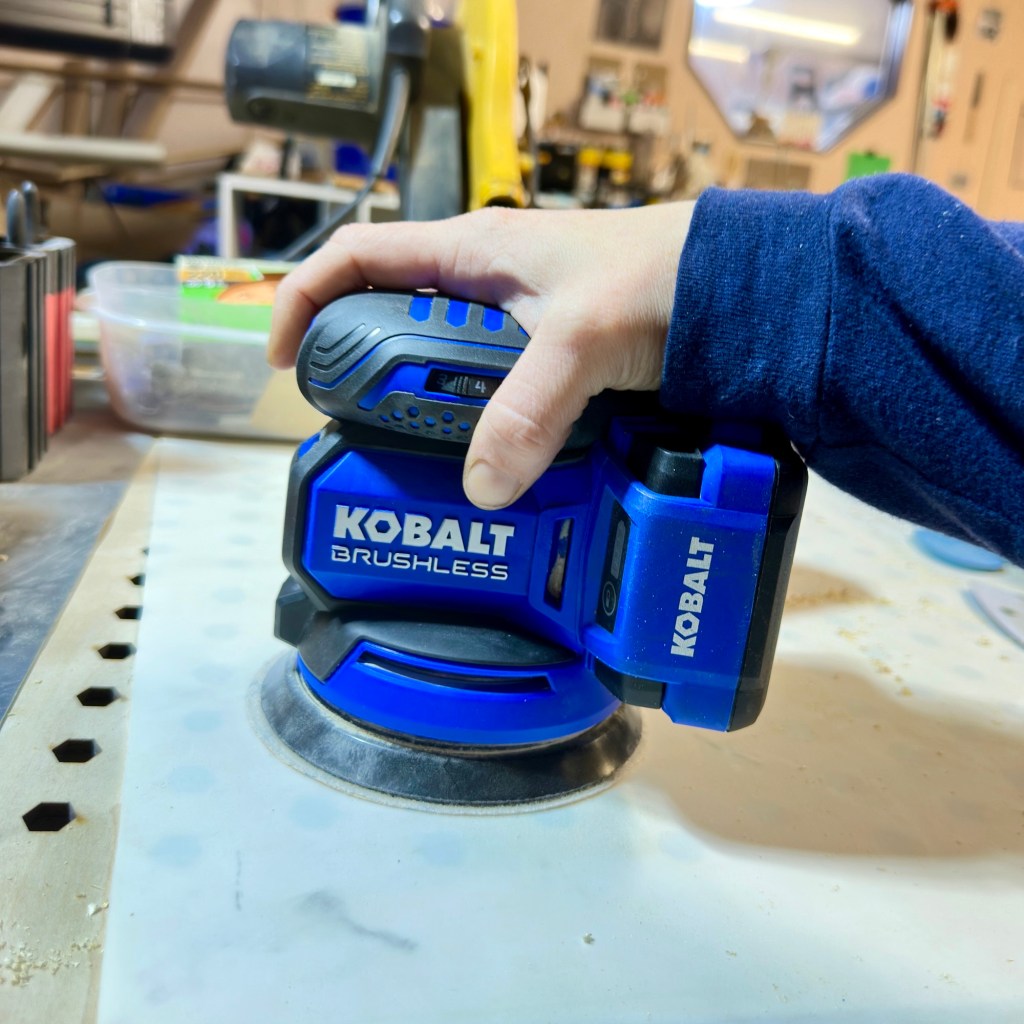
Now that the laser engraving is done, it’s time to clean up the charred edges and make the surface smooth and polished. That’s where my new Kobalt Brushless Palm Sander comes in!
I just picked this little guy up from Lowe’s after waiting months for it to be back in stock. When I finally saw it on display again, I knew I couldn’t pass it up. Kobalt tools always seem to pull at my money heartstrings because every single one I’ve bought has been amazing!
So far, I have zero regrets about this one! It feels great in my hand, gives me better control, and adjusting the speed settings is super easy. Plus, the built-in dust collector is a nice bonus. If you’ve been on the fence about getting one, I say go for it!
In this step, I used the sander to smooth out any rough edges from the laser engraving, giving the wood a clean and polished feel. Once that was done, I was ready to move on to the staining process—which really brings out the character of the wood!
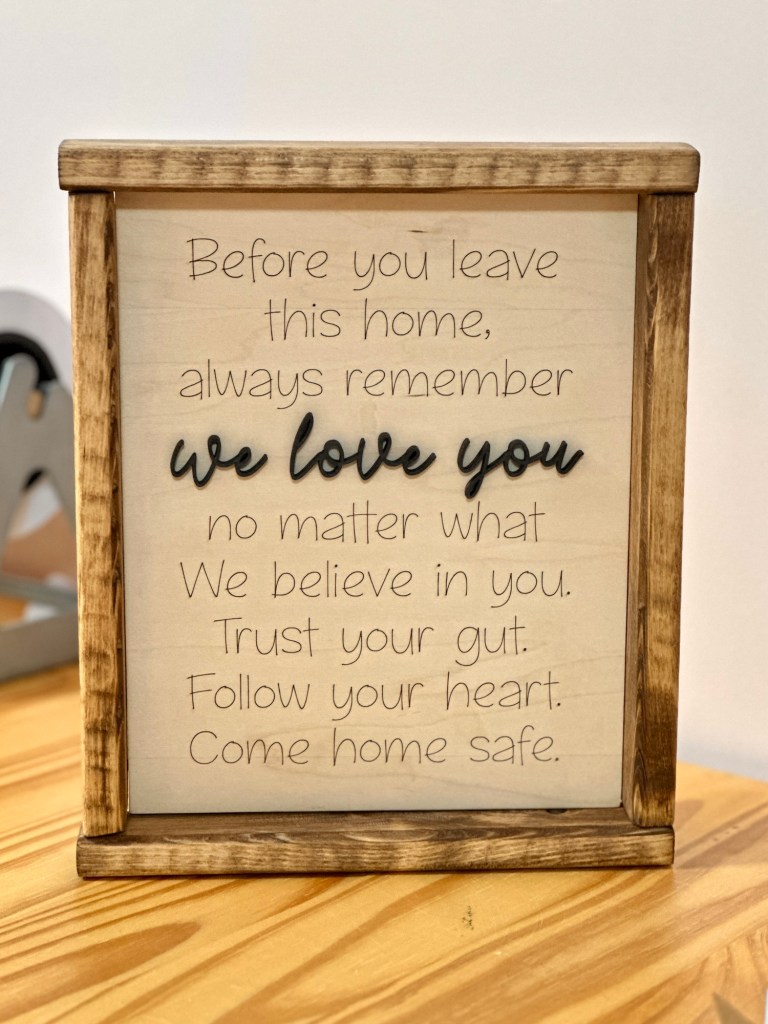
Step 3: Adding a 3D Touch for Extra Charm

Something about the sign still felt like it was missing a little something, so I went back over to the laser for another round of magic!
I grabbed a piece of pre-prepped black-stained 1/4” maple, set it in the laser, and let it do its thing once again. This time, I created a raised, layered piece for the words “We love you”, giving the sign a beautiful 3D effect. This extra detail really makes the message stand out, adding more depth and personality to the piece.
This little touch of dimension takes this inspirational family sign to the next level, making it even more special!
Step 4: Prepping the Rustic Farmhouse Frame

The other day, my husband and I learned how to make these beautiful rustic farmhouse-style frames, and I was so excited to see how this sign would look with the Early American stain!
My amazing husband cut the frame pieces down to size, and then I went back to work with my new favorite tool—the Kobalt Brushless Palm Sander—to smooth them out and get them ready for staining.
A good sanding ensures that the wood absorbs the stain evenly and gives the frame that clean yet rustic finish that I love. Now that everything is prepped, it’s time for the fun part—bringing out the rich wood tones with stain!
Step 5: Staining the Frame for a Rustic Finish

Now that the frame pieces are prepped and sanded, it’s time to bring them to life with stain! I love using Minwax Wood Finish in Early American because it gives the wood a warm, rustic tone that pairs perfectly with farmhouse-style decor.
Here, I’ve got my wood pieces laid out, stain stirred, and everything ready to go. Staining is one of my favorite parts of the process because it really enhances the natural grain and gives the frame that rich, handcrafted feel.
Next, I’ll apply the stain evenly, let it soak in, and then wipe away any excess before allowing it to dry. Once it’s ready, I’ll assemble the frame and put everything together for the finished look!
Step 6: Assembling the Frame – Time to Nail It Together!

That’s where one of our other favorite tools comes in—the Kobalt 24V Brushless Nail Gun!Is it just me, or does holding this make you feel like a certified woodshop warrior? 😆
It definitely takes a little getting used to because of its weight, but once you get the hang of it, it makes assembling frames so much easier. We’ve used it for several projects already, and it’s quickly becoming one of our most trusted tools in the shop.
With the frame pieces stained and dry, it was time to nail them together and complete this rustic farmhouse sign. Using the Kobalt nail gun, I secured the pieces, making sure everything was aligned perfectly. This tool gives a strong, clean hold, making the finished product look professionally crafted.
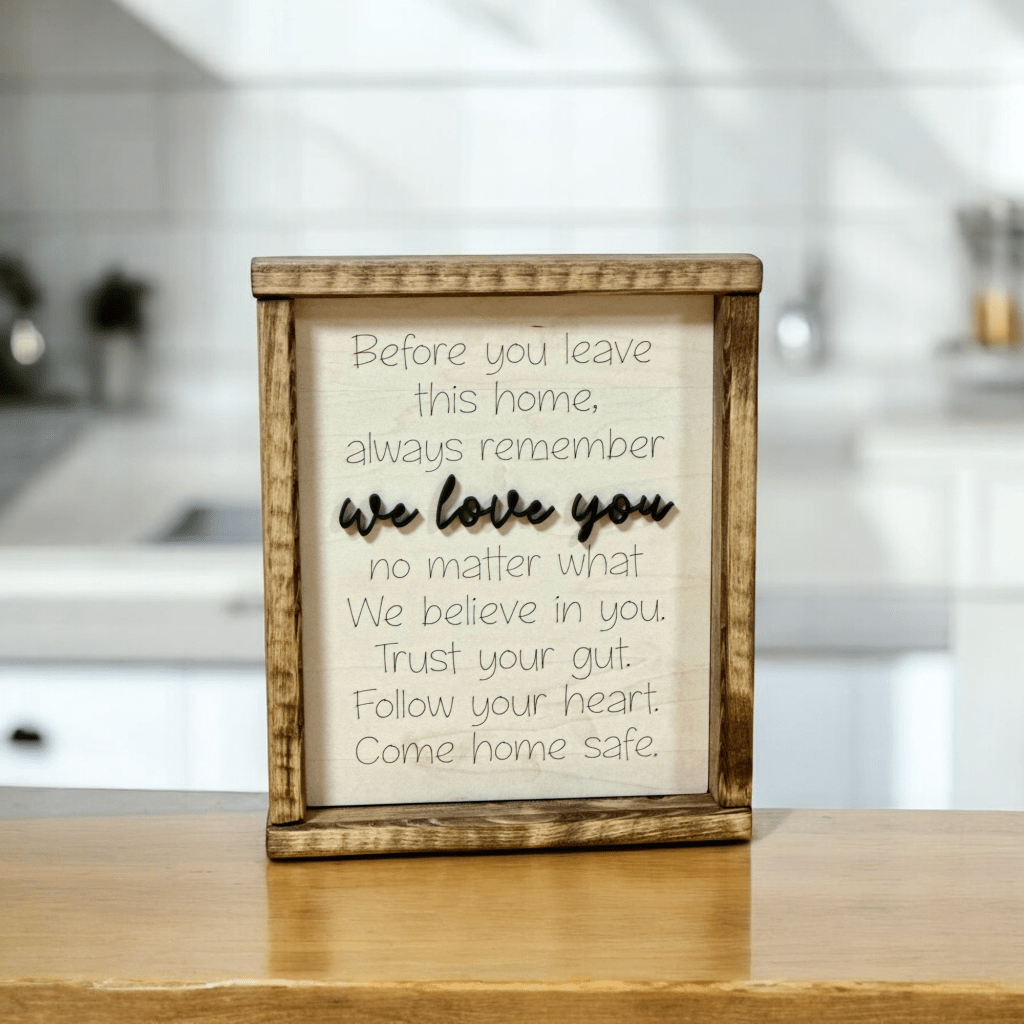
Step 7: The Final Reveal – A Special Sign for a Special Home

And here it is—the finished wood sign! I created this piece for my mother-in-law’s home, and I couldn’t be happier with how it turned out.
From the precisely engraved lettering to the 3D “We love you” detail and the beautifully stained rustic farmhouse frame, this sign is filled with warmth, love, and a meaningful message. It’s a gentle reminder for anyone heading out the door that they are loved, believed in, and always welcome home.
This project was such a joy to make—from designing, engraving, sanding, and staining to nailing it all together with our favorite tools. Every step was done with care and intention, making this a truly special piece.
Want One for Your Home?
If you love this inspirational family wood sign and want one for your own home, you can find it here at IMUPRU 💙👇
🛒 Shop Now: Before You Leave This Home – IMUPRU
I’d love to hear what you think! Let me know in the comments—would this sign be the perfect touch for your entryway? 💛


Leave a comment